Ditch the Spreadsheets: Import Shopify Products Using PIM
- Shopify offers a popular platform for eCommerce, but has in-system limitations when it comes to importing products.
- Integrating Shopify with a PIM solution like Catsy centralizes catalog data and enables automated syndication to any sales channel.
- PIM prevents wasted time struggling with spreadsheets while unlocking enterprise-grade productivity to scale your Shopify pipeline.
In this Article
How do you import Shopify products? If you use Shopify to operate your online stores, you’d know that uploading products using spreadsheets such as CSV files is tedious. It is even worse if you go the manual data entry route. While CSV imports seem like an improvement over the manual process, they still fall short when it comes to efficiently managing and scaling your product catalog.
Luckily, PIM software offers a better solution. It centralizes your product catalog and enables automated, real-time transfers of data to Shopify, eliminating the need for cumbersome spreadsheets. However, not all PIM platforms provide the eCommerce focus required to maximize value.
This article addresses Shopify product imports and covers the differences among the available options for uploading your product catalog. Ultimately, it will help you understand how implementing a Shopify PIM like Catsy can enhance your Shopify product data workflow.
| In this article you'll learn: | |||
|---|---|---|---|
Uploading Products to Your Shopify Store
Shopify is a widely popular eCommerce technology. BuiltWith shows that of the top one million online shops in operation today, 21% run on Shopify’s technology.
A recent Forbes Advisor analysis uncovers what could be driving businesses to Shopify – the platform ranks high among eCommerce platforms with an advanced feature set designed for selling online. Shopify integrates dropshipping capabilities, making selling online without an inventory easy, and it provides a comprehensive onboarding process.
However, whether you have inventory or not, you must showcase the catalog from which customers can decide to select the products they wish to buy. In other words, you will need, at some point, to provide a product catalog for your store.
Like many other eCommerce platforms, Shopify has built-in capabilities to enable users to populate the product catalog. You have a choice between manual data entry and automated uploads. There is also the advanced option of connecting with specialized tools like product information management (PIM) and digital asset management (DAM) tools.

Populating product information in Shopify manually
Entering data manually on your Shopify storefront is the most basic way to upload product information. The process is long, windy, and energy-sapping – you’d have to type in technical specs, attributes, and descriptions of one product after the other.
Here is a brief overview of how the process looks: :
1. Log in to your Shopify admin and navigate to the “Products” section. Click the “Add product” button.
2. In the product page that opens, begin typing the product title and description into the respective fields.
3. Select the product type from the dropdown menu (i.e., physical, digital, etc.) and input the vendor name.
4. Continue adding additional details as needed, such as:
- Pricing: Set the product price, specify the compare-at price if applicable, input the product’s cost per item, etc.
- Inventory: Track your product inventory by enabling inventory tracking, setting the initial quantity available, etc.
- Shipping: Configure shipping settings based on your business model.
- Variants: If your product comes in different variants (e.g., size, color), add them here. Also, assign specific prices, SKUs, and inventory quantities to each variant.
- Images: Upload high-quality photos of your product, rearrange them to showcase the product effectively, etc.
- Search engine listing preview: Optimize your product’s SEO by crafting a compelling title and meta description.
5. Click “Save product” when finished to make that single item live in your store.
6. Repeat the entire process for each product you plan to sell.
As you can imagine, entering dozens or hundreds of products in this manual and repetitive way is hugely labor intensive. It offers no scalability. Making matters worse, failure to double or triple-check your work will almost certainly lead to mistakes that hurt the customer experience.
While manually creating a few flagship products this way isn’t a big deal, relying on this approach alone results in wasted time that dwarfs any attempts at growing your business.
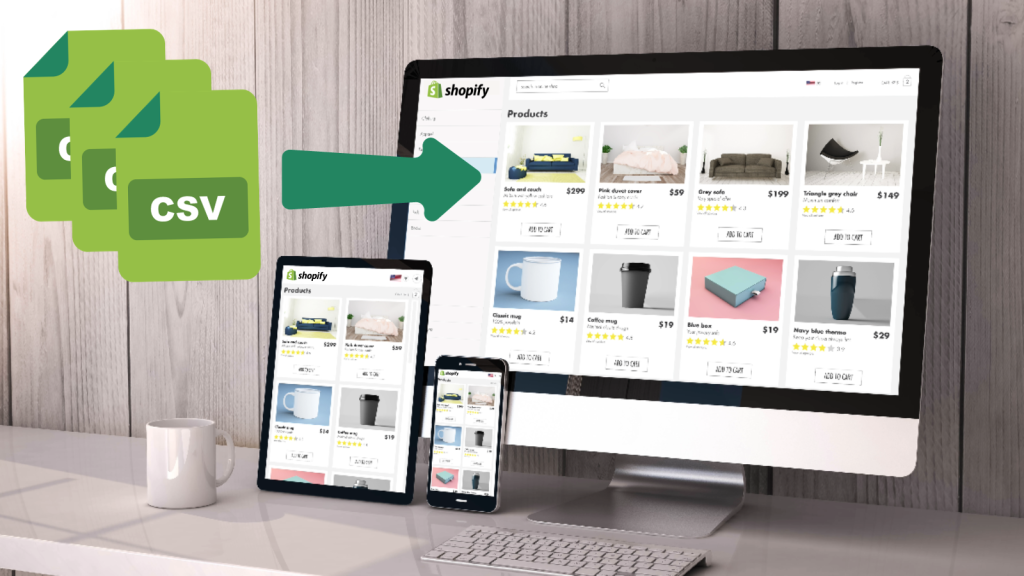
Streamlining product upload with CSV files
Shopify allows users to cut down manual labor (although not entirely) from the product upload process. You can upload data using a Comma-Separated Values (CSV) file. However, this process is tedious, especially if your file doesn’t match Shopify’s highly particular requirements.
Here is the typical upload process:
Step 1: Prepare your CSV file
Shopify requires users to organize product data in a particular format. Your CSV file must adhere to these considerations for the upload process to complete without a hitch.
Regarding format, the file should meet the following criteria:
- The first line of your product CSV file must be the column headers as specified in the product CSV description table.
- A comma must separate each column (this is pretty obvious because, after all, the file uses comma-separated values).
If you have a CSV file ready, you should make sure the format meets Shopify’s criteria. And there is more. Shopify has a particular order for columns, and each column should correspond to a specific attribute such as title, description, price, variant details, etc.
Some of the fields you should include in a Shopify-certified CSV file include:
- Handle: This is a unique identifier for the product, often similar to the product’s name.
- Title: This is the name of the product as it will appear to customers.
- Body (HTML): This field contains a description of the product. It can include simple HTML tags for formatting purposes.
- Vendor: This field should contain the name of the supplier or manufacturer of the product.
- Type: This is a categorization label for the product.
- Tags: This field should contain a list of tags associated with the product, separated by commas.
- Published: This field indicates whether the product is available on your online store.
- Option1 Name: If the product has variations (like size or color), this field should contain the name of the variation.
Remember, these are just the basic fields. Depending on your products, you might need to include more fields such as price, SKU, inventory, and others.
This implies you’d need some time to clean up your file – the hours spent depend on the number of products. If you are an industrial brand, this could take weeks, if not months, to complete.
Alternatively, you can download a CSV file template from Shopify and then populate the relevant fields.
Step 2: Import Shopify products
Navigate to your store’s URL and log into the Admin dashboard. Find and click on the “Products” section in the left-hand sidebar.
Within this section, locate and click on the “Import” button. This initiates the process of importing products using a CSV file.
Step 3: Choose the CSV file
You will be prompted to select the CSV file from your computer. Click on the “Choose File” button and select the prepared CSV file.
Step 4: Verify CSV file format
Shopify will ask you to confirm the CSV file format. Ensure that the delimiter (usually a comma) matches the layout of your CSV file. Click “Next” to proceed.
Step 5: Map CSV columns to Shopify fields
This step involves mapping the columns in your CSV file to the corresponding fields in Shopify. For example, match your CSV’s “Title” column to the “Title” field in Shopify. Ensure accurate mapping to avoid data misalignment.
Step 6: Review and confirm import
Shopify will provide a preview of your data based on the mapping. Take a moment to review and ensure that the information is correct. If everything looks accurate, click the “Confirm” button to initiate the import.
Step 7: Monitor the import progress
Once confirmed, Shopify will process the import. Monitor the progress, and depending on the size of your catalog, this may take some time. You’ll receive a notification when the import process is complete.
Step 8: Review imported products
After the import is successful, navigate back to the “Products” section in Shopify. You should see the newly imported products listed. Verify the details to ensure that the data has been accurately transferred.
On the surface, this automated approach seems far superior to repetitive manual entry. However, it has inherent drawbacks:
- Creating and editing large, intricate product CSVs is enormously cumbersome, offering a slight improvement over manual UI input.
- Spreadsheet programs like Excel are not built for robust product data management, leading to scaling issues.
- No integration between your product catalog and other business systems – changes must be manually tracked.
- As your inventory fluctuates, prices change, etc., the exported CSV, edits, and re-upload routine must be endlessly repeated. And if any mistakes occur, you risk overwriting existing correct product data with errors.
You can avoid some of the issues with the following tactics:
- Keep your CSV file well-organized with accurate and up-to-date data.
- Save a file backup in case you need to re-import or make adjustments.
- Regularly update the file to reflect changes in your product catalog.
Nonetheless, it is clear that CSV imports provide some initial time savings but falls short when it comes to maintaining and scaling catalog data over the long run. There are better solutions, as we’ll see next.
Fast Product Uploads & Data Enrichment for Shopify Using PIM
A product information management (PIM) system takes automated data transfers to another level compared to manual processes or CSV upload methods.
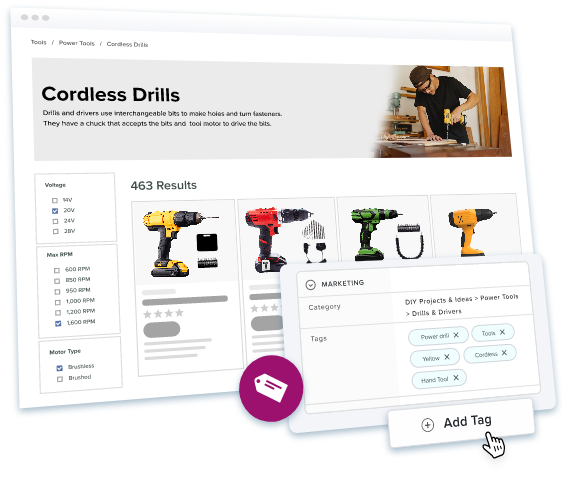
A PIM solution like Catsy does more than just remove manual labor from importing products to your Shopify store. It takes in product information from different sources (spreadsheets and platforms like ERP, CMS, etc.) and stores it in one location. Then, your organization can set and enforce quality and completeness standards, ensuring the data is accurate and consistent across channels.
Another standout feature of an eCommerce PIM is automated data enrichment. Through predefined rules and workflows, a PIM like Catsy can enrich product information by flagging missing details and standardizing formats. This automation significantly reduces the time and effort required to ensure that product data is comprehensive and up-to-date.
Integrating Shopify with PIM
Let’s say you’ve done your shopping around the market and have settled on Catsy as your preferred solution to supercharge your Shopify store. How do you get started?
First, you need to have your Shopify store up and running. If you don’t have one, follow this article to learn how to do it. In fact, the post takes you through creating multiple stores and using Catsy PIM to manage them centrally.
Secondly, contact Catsy’s support team so they can create your channel.
Take time to familiarize yourself with the Shopify channel dashboard in Catsy and learn how to employ channel mapping. With the familiarization out of the way, you are now ready to sync your data to Shopify.
Integrating Shopify with PIM has infinite benefits for your brand. For example, implementing the Catsy Shopify integration has the following advantages:
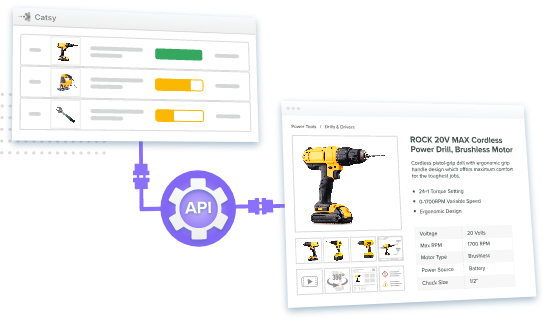
1. Increased upload speed
With Catsy PIM, pushing your product catalog to Shopify happens in mere seconds. The direct API connection automates the process of transferring even tens of thousands of SKUs in one batch – a task that would take days through manual entry.
The automated integration eliminates the cumbersome effort required for bulk CSV uploads as well. No more downloading, modifying, and re-uploading the same giant files anytime you want to edit products. You make catalog changes once in Catsy, and the system pushes those updates to your Shopify store automatically in real-time. That way, teams can refocus the saved time on critical business growth initiatives rather than repetitive busywork.
2. Enhanced data accuracy
A PIM like Catsy unifies your data sources, creating a central hub for managing all your product data seamlessly and keeping Shopify populated with the latest accurate information. Rather than relying on error-prone manual entries or CSV uploads, Catsy consolidates the creation, editing, governance, and distribution of your catalog.
This single source of truth minimizes inconsistencies, inaccuracies, and duplications that easily creep in when attempting to update various channels individually. The automation also prevents human errors during the upload process itself – no more typos or formatting mistakes. You can trust that the product details, like pricing, descriptions, inventory, and assets, fully match Catsy’s centralized catalog.
3. Easy data editing & updates with Enrichment Dashboards
You can forget the headaches of product data edits when you implement a PIM like Catsy. Any changes made to items in the PIM automatically get pushed to Shopify in real-time rather than waiting for cumbersome CSV re-uploads.
Let’s say your supplier notifies you of a sudden 5% price increase across your entire catalog. Rather than scramble to download, update, and re-upload a huge product CSV, you simply adjust the pricing for all SKUs just once within Catsy. Those new costs flow instantly to your Shopify checkout without you lifting another finger.
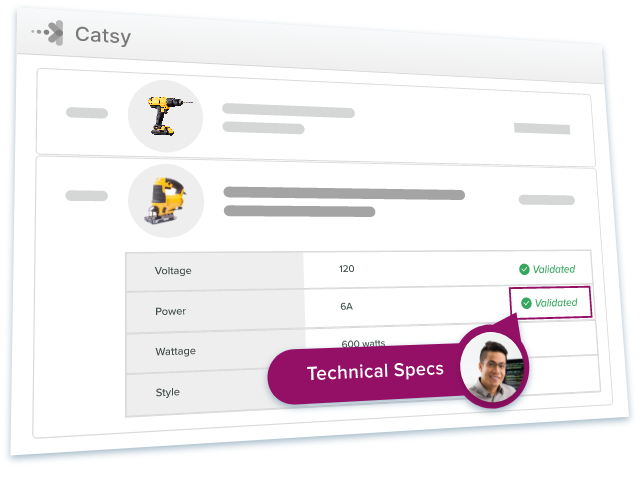
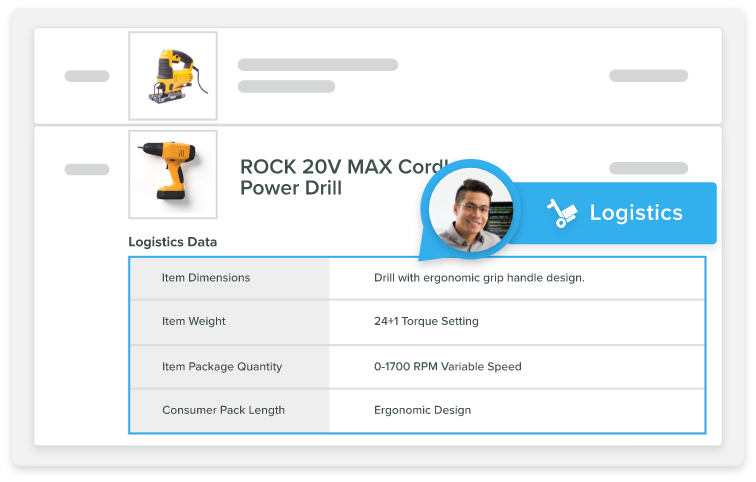
A robust PIM also lets teams know when product data is ready for syndication. Catsy PIM provides team-based enrichment dashboards that runs validation checks on all entries destined for your Shopify store catalog for a specific team, such as logistics, for example. Rules trigger clear visual indicators when pricing, descriptions, classifications, or other attributes fail predefined requirements for completeness and accuracy.
The tool takes the uncertainty out of your Shopify product data readiness with real-time insights. Rather than crossing your fingers and guessing if product uploads will work, the tool provides clarity. The enrichment dashboards feature measures the state of your catalog so you can optimize it for channel distribution with high confidence in the quality. This prevents frustrating rejections or scrambles during the upload process itself down the line.
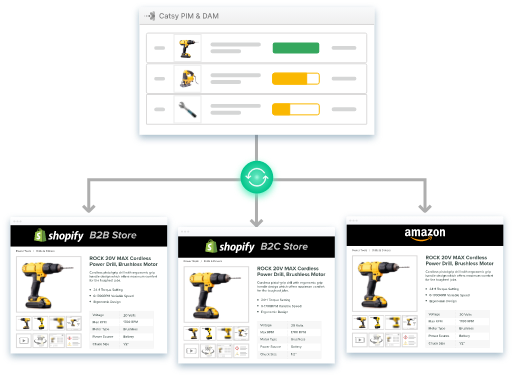
4. Seamless omnichannel management
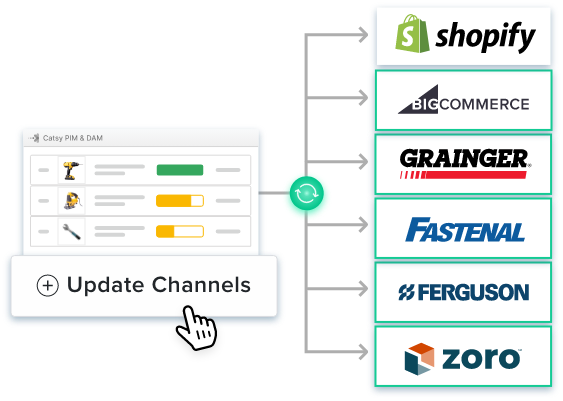
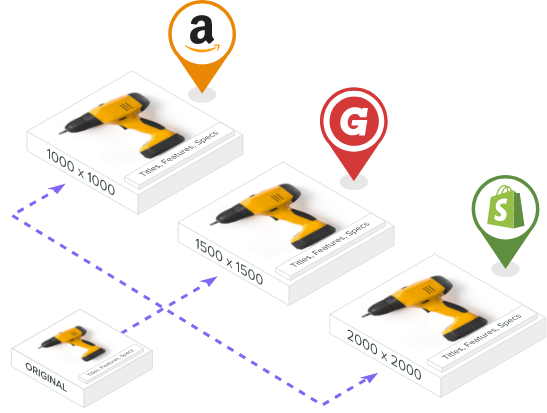
Juggling product data across multiple sales channels can quickly become an operational nightmare. A PIM like Catsy solves this by tying everything together to unify and simplify distribution. The centralized catalog maps out which item details flow into Shopify, Amazon, Walmart, social ads, and every other outlet through which you sell.
Rather than struggling with a convoluted workflow of exporting giant CSV files from separate systems to distribute item updates, you simply adjust products once within Catsy. The platform’s connectors then automatically push those changes out to all mapped stores, keeping critical details like pricing consistent no matter the touchpoint.
Catsy PIM takes the multitasking feature a notch higher. Despite Shopify’s single-store setup, Catsy can connect separate stores to enable centralized data, assets, workflows, and control. This allows brands to operate multiple Shopify stores seamlessly.
5. Improved SEO
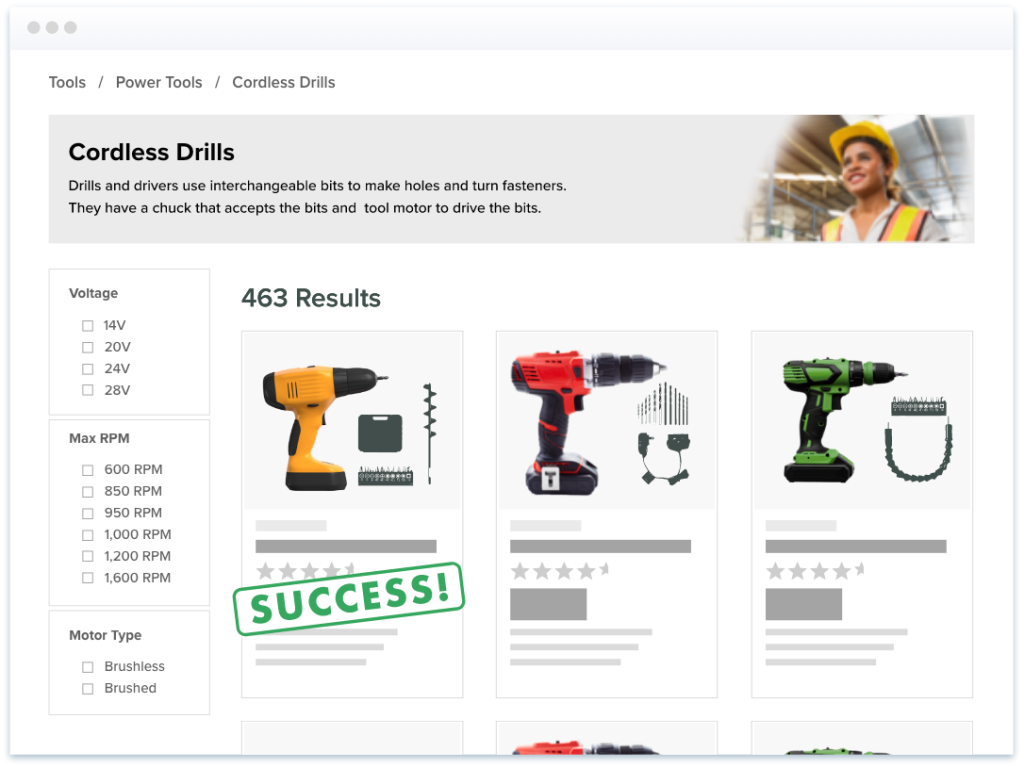
Another powerful capability that PIM brings is enhancing your store’s findability thanks to SEO best practices woven directly into the platform. The system standardizes product schemas with optimal attributes to help Shopify correctly index listings for both site search and public search engine discoverability.
A PIM like Catsy achieves this goal in the following ways:
- Complete product data: It ensures that all product data is complete and accurate, which is crucial for SEO as search engines favor websites with comprehensive and relevant content.
- Optimized product images: Catsy PIM has a built-in Digital Asset Management (DAM) solution that handles everything related to your product’s digital assets. The digital asset management program allows you to map images to corresponding product data. It enriches and optimizes the assets with meta tags and search-engine-optimized alt-text and exports them in a channel-ready format. Well-optimized photos can improve your store’s visibility in image search results.
- Improved product discoverability: Catsy allows you to add unlimited attributes to products for enhanced faceted search and keyword findability. This can improve your store’s visibility in search engine results.
6. Bulk editing tools
Managing a growing product catalog while ensuring every SKU stays updated across sales channels quickly becomes unfeasible without bulk editing tools. A PIM like Catsy provides extensive bulk editing functionality to help streamline changes instantly across hundreds or thousands of Shopify-bound items.
Rather than facing the mind-numbing prospect of manually tweaking each product individually, Catsy’s filters and tagging allow the selection of huge batches of SKUs for mass updates in one click. If you need to increase pricing by 10% for all power drills, for example, choose the category and apply the adjustment across the board instantly.
Catsy also enables setting up flexible rules to automatically populate or standardize data as new products get created and synced over time. Defining these mappings upfront significantly accelerates the process of getting SKUs ready for your Shopify pipeline. No more scrambling to check every product before uploads.

7. Version control
PIM systems automatically track and log changes made to product data. For example, Catsy delivers complete visibility by tracking every update to each SKU along with precise details like previous values, editor names, timestamps, and more.
Considering that the platform has an integrated DAM, it means any changes touching the digital assets are tracked. Each modification, addition, or deletion of product data or rich media is recorded to create a historical version trail.
In contrast, managing version control in CSV files typically involves manual tracking or creating multiple copies of the file, making it more prone to errors and version conflicts. Plus, you’d have to engage a vendor for digital asset management capabilities.
8. Image reformatting tools
Visuals drive conversions, but editing hundreds of product images one by one kills productivity. Using a regular PIM without DAM integration won’t be of any use either. You’d have to purchase the solution (DAM) separately from a different vendor and then piece the platforms together to solve the challenge. This is not ideal.
Catsy PIM has pre-built integrations with DAM, meaning you get both with a single purchase. In addition to the streamlined mapping of product details to rich media, the platform enables bulk visual content editing and transformation.
Rather than struggling through manual adjustments, Catsy allows you to set up automated batch editing processes. In just a few clicks, all images bound for your Shopify store can get resized, cropped, enriched, and more to match merchandising needs.
Beyond transformations, the system identifies blurry images that fail to meet quality guidelines. Automatic image enhancement further refines qualities like brightness, contrast, and orientation so listings appear vibrant.
Key Takeaways
Shopify is undoubtedly one of the most popular and powerful eCommerce platforms, providing robust tools for building an online store. However, the platform’s native capabilities fall short when it comes to efficiently uploading, managing, and distributing large product catalogs over the long haul.
Implementing a robust PIM solution like Catsy unlocks transformative productivity gains. The tool centralizes your product data and assets and automates your entire product content workflow from start to finish.
This prevents wasting endless hours on rigid CSV tweaks, manual entries, or data scrambles to fix errors before going live. With Catsy powering the backend through API syncs, your Shopify pipeline gains enterprise-grade enrichment, governance, and omnichannel distribution tools.
Some key drawbacks of relying on CSV files for Shopify product uploads include rigid formatting requirements, no integration between systems leading to manual tracking of changes, and no bulk editing capabilities. As your catalog scales, the export-edit-reimport routine with CSVs becomes extremely inefficient.
Catsy offers a direct channel integration to sync your product data with Shopify. After creating your Shopify store, contact Catsy’s support team to build the connector. Then you can map your centralized PIM catalog to the Shopify fields and enable automated, bi-directional data flows.
Yes, one of Catsy’s standout features is enabling centralized management of multiple Shopify stores from a single platform. This allows you to maintain consistent product data across separate stores instead of managing each one individually.
Catsy standardizes product schemas and structures data in an SEO-friendly format. It also enriches content with additional attributes to improve on-site search and public search engine discoverability. The integrated Digital Asset Management (DAM) solution also optimizes images with metadata and alt text.
Yes, Catsy enables bulk editing of product details, assets, pricing, inventory, and other attributes mapped to your Shopify catalog. This allows editing hundreds or thousands of SKUs instantly versus tedious individual product manual adjustments.